
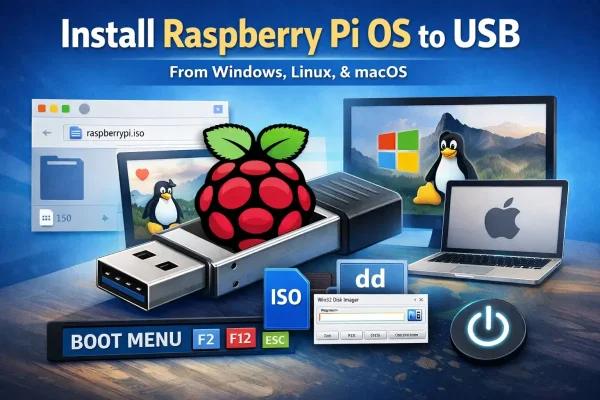
How to Install Raspberry Pi OS to USB from Windows (Manual Method): Want to run Raspberry Pi OS directly from a USB drive on your Windows PC? This guide shows you how to manually install Raspberry Pi Desktop to a bootable USB using tools like Win32 Disk Imager or dd.
This method lets you test the Raspberry Pi desktop environment without a Raspberry Pi board, run a portable Linux system, or safely experiment without modifying your main hard drive.
How to Install Raspberry Pi OS to USB from Windows
- Download the Raspberry Pi Desktop ISO
- Insert a USB flash drive (8GB or larger)
- Write the image using Win32 Disk Imager or dd
- Restart your PC and boot from the USB device
What You Need
- 7-Zip – Extract compressed files
- Win32 Disk Imager or dd for Windows
- Raspberry Pi Desktop ISO
- USB Flash Drive – 8GB or larger recommended
Create a Bootable Raspberry Pi USB (Win32 Disk Imager)
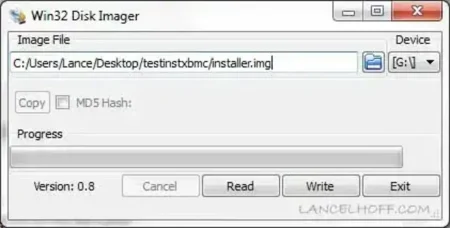
- Insert your USB flash drive
- Extract Win32 Disk Imager using 7-Zip
- Launch
Win32DiskImager.exe - Select the Raspberry Pi Desktop ISO file
- Choose your USB drive letter
- Click Write and wait for completion
Create a Bootable USB Using dd (Windows)
Warning: This process will erase all data on the selected drive. Double check before continuing.
- Download the Raspberry Pi Desktop ISO
- Insert your USB drive
- Open Command Prompt as Administrator
diskpart- List disks:
list diskIdentify your USB disk number carefully.
- Select your disk:
select disk X- Clean the drive:
clean- Exit diskpart:
exit- Write the image using dd:
dd.exe if=path-to-raspberrypi.iso of=\\.\PhysicalDriveX bs=4M --progress- Restart your PC and boot from the USB device
Create a Raspberry Pi OS USB Using YUMI (exFAT Method)
You can also use YUMI exFAT (Your Universal Multiboot Installer) to create a bootable USB that supports multiple operating systems. This is a great option if you want to run Raspberry Pi OS alongside other Linux distributions, USB Windows installers, or recovery tools from a single USB drive.
Compared to traditional multiboot tools, YUMI exFAT offers improved compatibility and works well with Raspberry Pi Desktop in most cases.
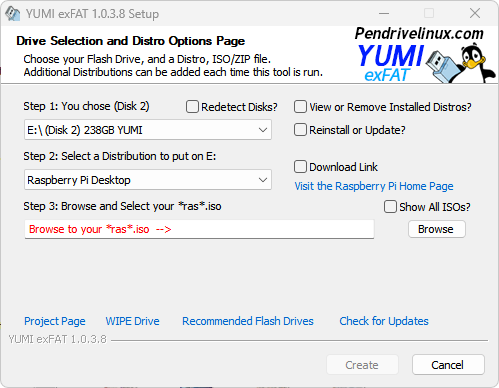
- Download and launch YUMI exFAT
- Select your USB flash drive
- Choose Try Raspberry Pi from the distribution list
- Browse and select the Raspberry Pi Desktop ISO file
- Click Create and wait for completion
- Restart your computer and boot from the USB device
If you encounter boot issues, consider using the direct imaging methods above for maximum compatibility.
Create a Bootable USB Using dd (Linux)
Warning: Selecting the wrong device will overwrite data.
- Download the ISO file
- Insert your USB drive
- Open a terminal
- Identify the USB device:
sudo fdisk -lLook for a device such as /dev/sdX.
- Write the image:
sudo dd if=path-to-raspberrypi.iso of=/dev/sdX bs=4M status=progress oflag=sync- Reboot and select the USB from the boot menu
Create a Bootable USB Using dd (macOS)
Warning: Confirm the correct disk identifier before writing.
- Download the ISO file
- Insert the USB drive
- Open Terminal
- List disks:
diskutil listIdentify your USB (for example /dev/disk2).
- Unmount the disk:
diskutil unmountDisk /dev/disk2- Write the image:
sudo dd if=path-to-raspberrypi.iso of=/dev/rdisk2 bs=4m- Eject the drive:
diskutil eject /dev/disk2How to Boot from the USB Drive
- Restart your computer
- Enter BIOS or Boot Menu (F2, F12, DEL, or ESC)
- Select the USB device
- Continue booting
Tips for Best Performance
- Use a USB 3.0 or faster drive
- Performance depends on your hardware
- Your internal drive remains untouched
Final Notes
You now have multiple ways to install and run Raspberry Pi OS from a USB drive on Windows, Linux, or macOS. This is a safe and flexible way to test the Raspberry Pi desktop environment, experiment with Linux, or carry a portable operating system wherever you go.