
Welcome to my DIY faux stone fireplace makeover using GenStone panels. This project completely transformed our living room by adding the timeless look of natural stone without the mess, heavy labor, or long turnaround time that typically comes with traditional masonry work. If you have ever dreamed of a stone fireplace feature wall but wanted a more DIY-friendly solution, this GenStone faux stone fireplace project may be exactly what you are looking for.
My DIY GenStone Faux Stone Fireplace Project

As the flames now dance inside the hearth, the rustic character and natural elegance of faux stone sit at the heart of our home. What was once a plain wall has become a true focal point that consistently draws compliments from guests. The finished result looks like real stone, yet it is all thanks to the craftsmanship of GenStone faux stone panels. In this guide, I will walk you through the entire process of building a GenStone faux stone bump out wall with an electric fireplace.
DIY Faux Stone Fireplace Installation Overview
- Choosing an Electric Fireplace
- Planning and Marking the Wall for Placement
- Creating a Bump Out Wall Frame for the Fireplace
- Preparing the Frame for GenStone Panels
- Attaching Faux Stone Panels
- Choosing a Fireplace Mantel
Creating a Bump Out Wall for the TV and Fireplace
Before starting construction on the bump out wall, I needed to determine the exact size and style of electric fireplace I wanted to install. Since we already had a television selected, the fireplace dimensions would ultimately dictate the overall layout and proportions of the bump out.
Choosing an Electric Fireplace
My first step was selecting the right electric fireplace for this project. I chose the 60 inch version of the R.W.Flame electric fireplace. One of the biggest advantages of this model is its slim depth of less than 4 inches, which made it ideal for a bump out wall design. The flat glass panel slides on and off easily, providing quick access and eliminating the need to create a custom bezel or precisely trim faux stone panels behind it.
Out of all the electric fireplaces I researched, this one also offered the most realistic flame appearance. The flame color, ember bed color, and brightness are fully customizable using either the touchscreen controls or the included remote. It features two heat modes at 750W and 1500W and has done a great job adding a few extra degrees of warmth to our living room during cold winter nights.
Planning and Marking the Wall for Placement
Once the fireplace was selected, the next step was planning the bump out wall dimensions and marking the placement on the existing wall. I chose to center the entire structure so it would feel balanced and proportional to the furniture layout in the room.

Creating a Bump Out Wall Frame for the Fireplace
Next, I built the frame for the bump out wall that would support both the TV and the electric fireplace. Standard 2x4 lumber was used to create the structural skeleton. I built the wall in two sections, a lower box and an upper box, using only 2x4x6 and 2x4x4 boards.
Building the frame in two stages made the entire process much easier for one person to manage. Each section could be assembled, transported, and mounted individually before being secured together.


Choosing Faux Stone Fireplace GenStone Panels
After spending about a week researching different faux stone panel manufacturers, I ultimately chose GenStone. GenStone is a well known and respected manufacturer of high quality faux stone and brick veneer panels designed to closely replicate the appearance of natural stone.
As a synthetic alternative to real stone, GenStone products provide a lightweight, cost-effective, and low maintenance solution for both interior and exterior projects. Their panels are made using a proprietary polymer blend that results in a durable and weather resistant material. This makes them suitable for DIY homeowners as well as professional installers.
GenStone faux stone panels are available in a wide range of colors, styles, and textures, allowing homeowners and designers to achieve nearly any aesthetic without the expense and labor of traditional masonry. Installation is straightforward, which is a major reason these panels are so popular among DIY enthusiasts.
After reading reviews and speaking directly with the company, I ordered several sample panels in different colors. Although GenStone charges upfront for samples, the full cost is credited toward your final order. After comparing the samples in our space, we chose the Kenai panel color, which closely matched the exterior stone on our home.

Preparing the Frame for GenStone Panels
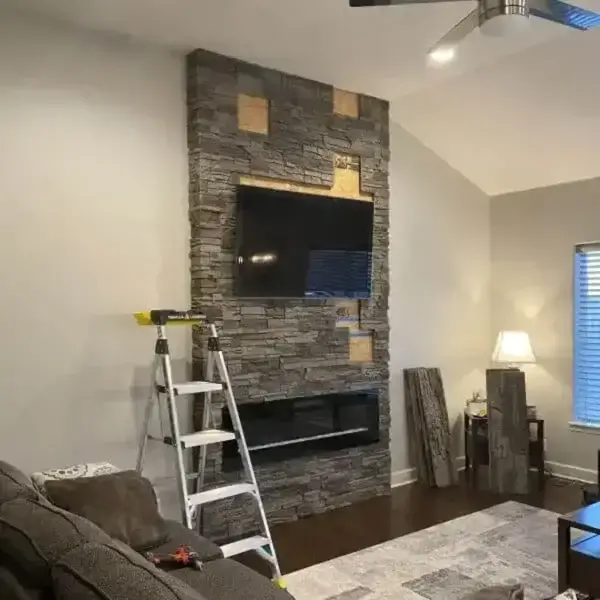
I wanted the bump out wall to be extremely solid and allow the GenStone panels to be screwed in anywhere without worrying about weak spots. While this step may be considered overkill by some, I chose to sheath the entire face of the frame with OSB board.
This created a continuous, sturdy surface that made attaching the faux stone panels much easier and more secure.

Attaching Faux Stone Panels
This was easily the most enjoyable part of the project. Installing the GenStone faux stone panels was straightforward and surprisingly relaxing. The lightweight, foam-like material can be cut using a standard handsaw, and edges can be refined with a simple set of files.
The only thing to be mindful of during this step is dust. I did all cutting and shaping in the garage to keep the house clean.

At this stage, the faux stone bump out wall was nearly complete.
Choosing a Fireplace Mantel
For the fireplace mantel, we chose Urbandi. We selected their rustic mantel in the Jacobean color. Urbandi is known for excellent craftsmanship, and their mantels include a hidden floating mount that makes installation clean and straightforward.
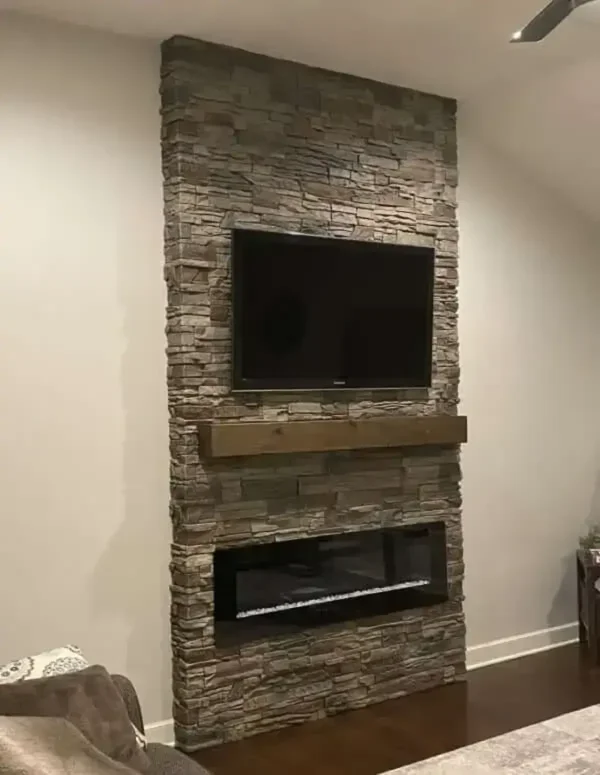
After installing the mantel, the final step was to caulk and blend any visible seams between the GenStone panels. Once that was complete, all that was left to do was turn on the fireplace, pick a movie, and enjoy our newly transformed living room.
DIY Faux Stone Fireplace FAQ
Are GenStone faux stone panels safe for fireplaces?
Faux stone panels are safe to use around electric fireplaces and decorative fireplace builds. Because electric fireplaces do not produce open flames or extreme surface heat, they pair especially well with faux stone panels. Always follow the fireplace manufacturer clearance guidelines for safe installation.
Can GenStone panels be installed by one person?
Yes. One of the biggest advantages of faux stone panels is their lightweight design. Most of this fireplace bump out project was completed by one person without specialized tools. Building the frame in sections and using OSB sheathing made solo installation much easier.
Do GenStone faux stone panels look realistic?
In person, GenStone panels look surprisingly close to real stone. The textures, color variation, and depth give the wall a natural appearance that consistently fools guests. Once installed and blended at the seams, it is very difficult to tell they are not real stone.
Is a bump out wall required for a faux stone fireplace?
A bump out wall is not required, but it allows you to create a strong focal point and cleanly integrate an electric fireplace and TV. The bump out also adds depth and architectural interest that a flat wall simply cannot provide.
How long does a DIY faux stone fireplace project take?
The timeline depends on experience and available time, but this project was completed over several weekends. The framing and sheathing went quickly, while installing the faux stone panels was the most time consuming but also the most enjoyable part.
Disclosure: This post may contain Amazon affiliate links. As an Amazon Associate, I earn from qualifying purchases at no additional cost to you.