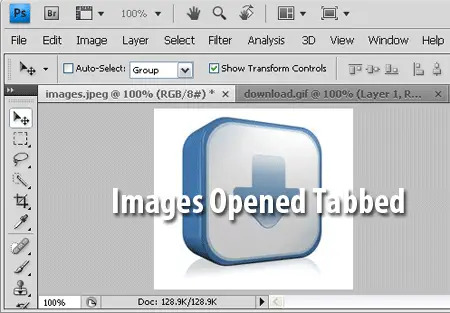
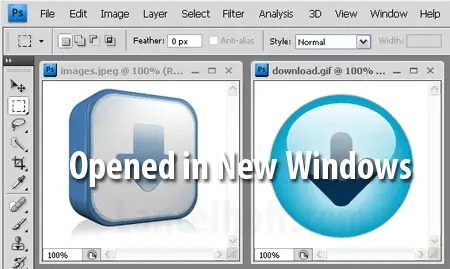
Adobe Photoshop - How to Open Files in a New Window: Photoshop versions CS4 and newer come with a new feature called "Tabbed Document Windows" (works like the tabbed browsing many browsers use). However, some people (myself included) do not like this new feature. In the following simple solution, I'll show you how to mimic the old Photoshop behavior of opening each image in a new window.
I am unsure of what the Photoshop development team was thinking when they implemented this Tabbed Document Windows feature. Tabbed images make it tough to copy features from one image to another, as both images are not viewable in the same window, at the same time.
Adobe Photoshop Tabbed Images (Default)

Adobe Photoshop Open Images in New Window (Preferred)

How to set Photoshop to open images in a new Window by default
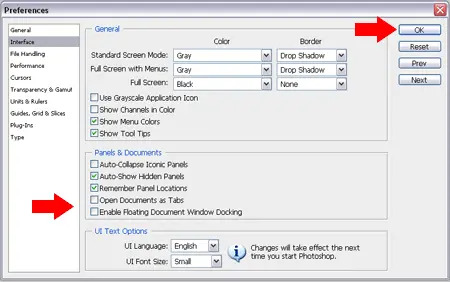
- Start CS4 and navigate to Edit > Preferences > Interface
- Uncheck the options Open Documents As Tabs and Enable Floating Document Window Docking and click OK

That's all there is to it. Now the default behavior of Adobe Photoshop CS4 should be to open your images in a new window instead of tabbed.
How to Open a PSD File
To open a PSD (Photoshop Document) file, you can use Adobe Photoshop. Simply follow these steps:
- Launch Photoshop: Open Adobe Photoshop on your computer.
- Open Dialog: Go to the "File" menu located at the top-left corner of the Photoshop interface and click on it. A dropdown menu will appear.
- Open File: From the dropdown menu, click on the "Open..." option. This action will open a file dialog box.
- Select PSD File: In the file dialog box, navigate to the location where your PSD file is saved. Click on the PSD file you want to open to select it.
- Open: After selecting the file, click the "Open" button. Photoshop will now load the PSD file and display it in the workspace.
- Edit the PSD: Once the file is opened, you can make edits, changes, and adjustments to the layers, elements, and other aspects of the PSD as needed.
- Save Your Work: After making your edits, you can save the file by going to the "File" menu again and choosing the "Save" or "Save As..." option. If you choose "Save," it will overwrite the existing file. If you choose "Save As...," you can save the edited file under a new name or location.
Remember that PSD files are the native file format for Adobe Photoshop, and they preserve all the layers, effects, and other data. If you want to share the file with someone who doesn't have Photoshop, you might consider exporting or saving a copy in a more widely supported format like JPEG, PNG, or PDF.
Additionally, make sure you have Adobe Photoshop installed on your computer to open PSD files. If you don't have Photoshop, you might not be able to open PSD files directly.
Opening WebP in Photoshop
Adobe has introduced native support for WebP files in Photoshop 23.2 and onwards. This makes it much more convenient for users to open, edit, and save images in the WebP format directly within Photoshop without the need for additional plugins or conversions.
To open WebP files in Adobe Photoshop (version 23.2 and later), you can follow these steps:
- Launch Photoshop: Open Adobe Photoshop on your computer.
- Open Dialog: Go to the "File" menu located at the top-left corner of the Photoshop interface and click on it. A dropdown menu will appear.
- Open File: From the dropdown menu, click on the "Open..." option. This action will open a file dialog box.
- Select WebP File: In the file dialog box, navigate to the location where your WebP file is saved. Click on the WebP file you want to open to select it.
- Open: After selecting the file, click the "Open" button. Photoshop will now load the WebP file and display it in the workspace.
- Edit the WebP: Once the file is opened, you can make edits, changes, and adjustments to the image, layers, and other aspects of the WebP file as needed.
- Save Your Work: After making your edits, you can save the file in the WebP format. To do this, follow these steps:a. Go to the "File" menu again. b. Select "Save a Copy..." c. In the "Save a Copy" dialog box, choose "WebP" from the Format dropdown menu. d. Choose the location where you want to save the file and click the "Save" button.
Please note that the specific steps may vary slightly based on the version of Photoshop you are using, but generally, the process should be similar to what I've outlined above. As always, it's nice to see Adobe expanding its native support for the most popular file formats!
WebP Photoshop Plugin
If you're using an older version of Photoshop without native WebP file support, you can always download and install the official WebP Photoshop plugin directly from GitHub.