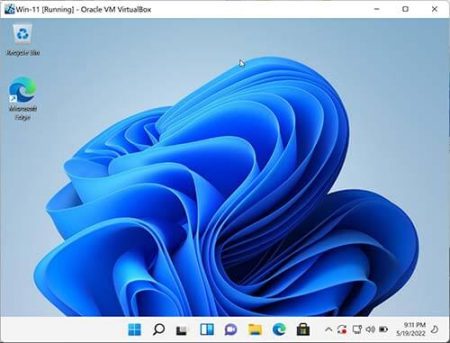
In this tutorial, I will show you how to install Windows 11 on VirtualBox without TPM chipset. This can be useful for those who want to test Windows 11 in a virtual environment or on a computer that doesn't have hardware that meets the minimum requirements.
This PC can't run Windows 11
The following setup is useful for cases when you encounter an error during Windows 11 Install.
"This PC does not meet the Minimum system requirements to install this version of Windows."

Windows 11 is the latest version of Windows offered by Microsoft. The installation process is slightly different from previous versions. One of the most significant changes in this new version is the requirement for a TPM (Trusted Platform Module) chip. If you don't have one, you will need to install Windows 11 without requirements.
VirtualBox is popular open sourced virtualization software. It allows users to install and run multiple operating systems on their host machine with minimal hardware requirements. It's possible to install and run Windows 11 on VirtualBox without TPM chipset using this software once correctly configured.
How to Install Windows 11 on VirtualBox without TPM
- From within VirtualBox;
1.) Select New. 2.) Enter Windows-11 for the Name. 3.) Select Next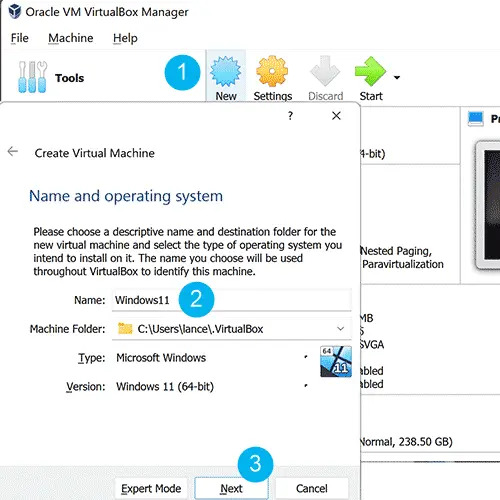
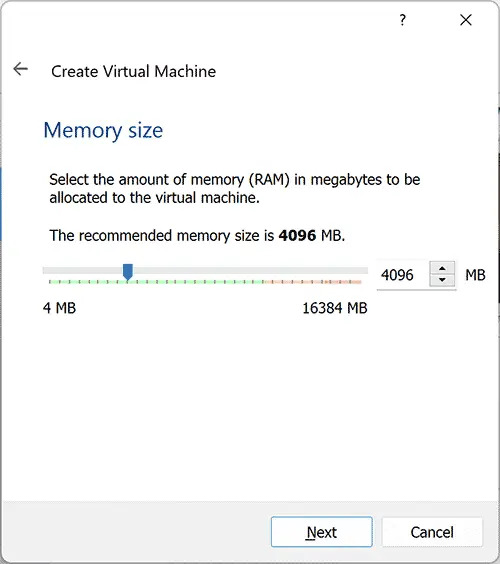
- Next, Set Memory Size to use for your Windows 11 Virtual Machine
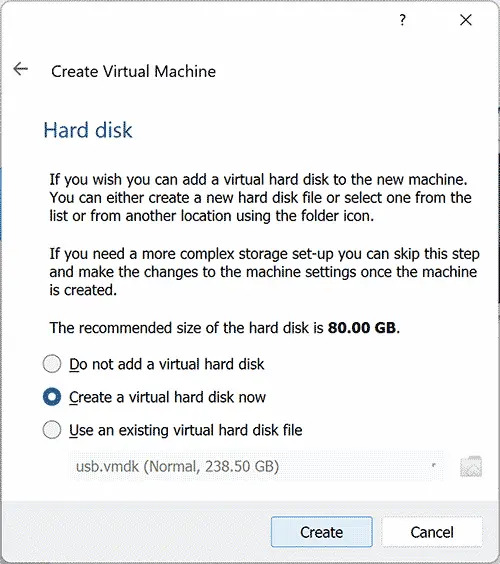
- Select create a virtual hard disk now and then click Create
- Set Hard Disk Type to VHD (Virtual Hard Disk) and then click Next
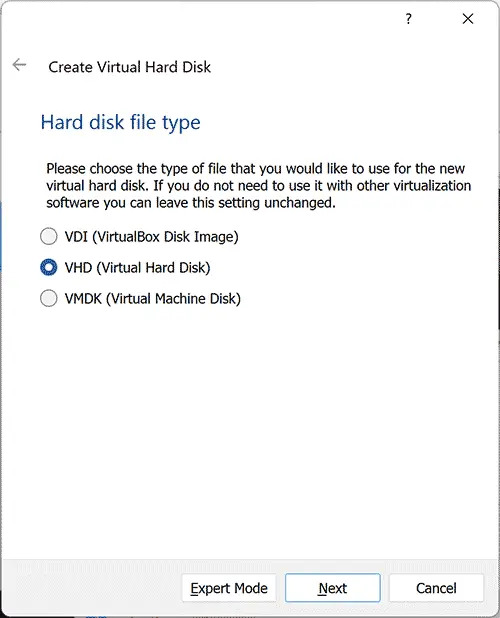
- Set storage size to Dynamically Allocated and then click Next
- Adjust the size of your Virtual Hard Disk File, then click Create
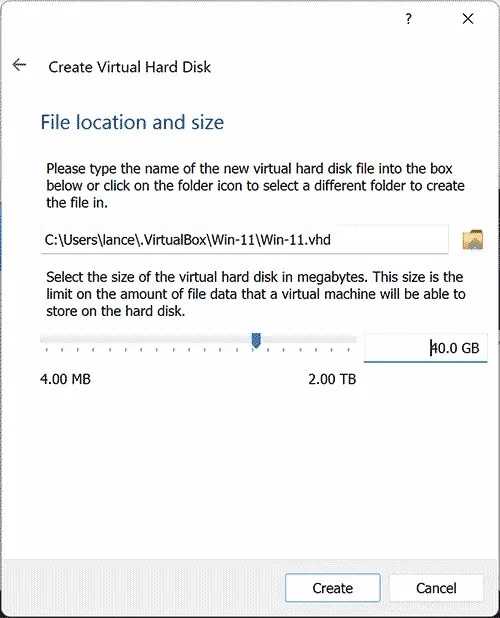
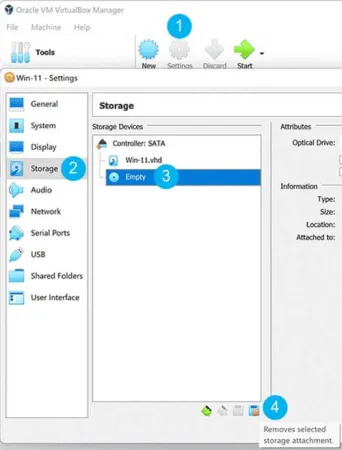
- Now go to Settings > Storage, and remove the Empty optical drive
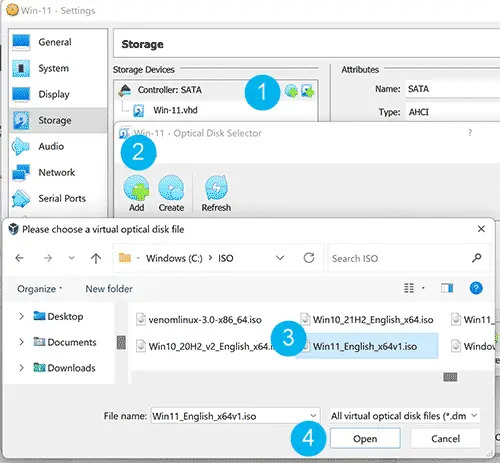
- Now Add a New optical drive to the storage controller
- Back at the VirtualBox Manager, Click Start and then press any key when prompted to begin the install from CD/DVD
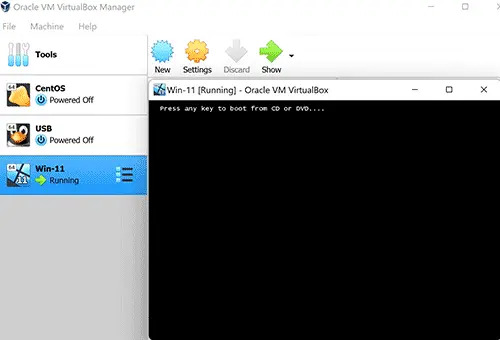
How to Configure Windows 11 to Install without TPM
Once the Windows 11 Installer begins, you'll need to run the registry editor to make some changes to the registry to bypass Windows 11 minimum system requirements.
- At Windows 11 Setup, press Shift + F10 to open a command prompt
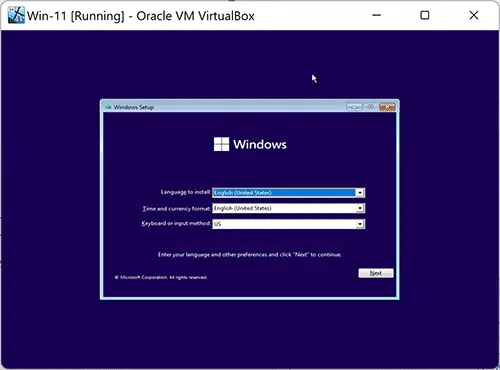
- From the command prompt type the following to add registry Bypass keys.
reg add HKLM\System\Setup\LabConfig
To disable TPM requirements, type;
reg add HKLM\System\Setup\LabConfig /v BypassTPMCheck /t REG_DWORD /d 1 /f
Then to disable RAM requirements;
reg add HKLM\System\Setup\LabConfig /v BypassRAMCheck /t REG_DWORD /d 1 /f
Next to disable Secure Boot check;
reg add HKLM\System\Setup\LabConfig /v BypassSecureBootCheck /t REG_DWORD /d 1 /f
And finally, this last key allows use of a Dynamic VHD;
reg add HKLM\System\ControlSet001\Services\FsDepends\Parameters /v VirtualDiskExpandOnMount /t REG_DWORD /d 4 /f
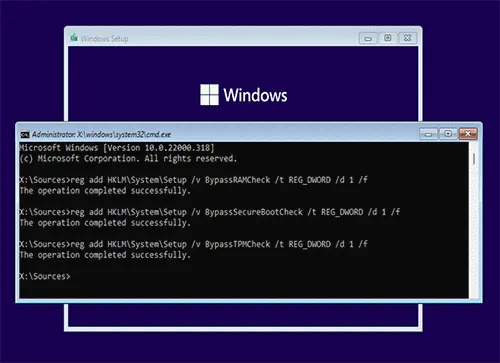
- Then type exit and press Enter.
- Click Next and go through the steps onscreen to install Windows 11 on your Virtual Hard Disk.
If all went well, you should eventually wind up with Windows running from a VHD image in VirtualBox
